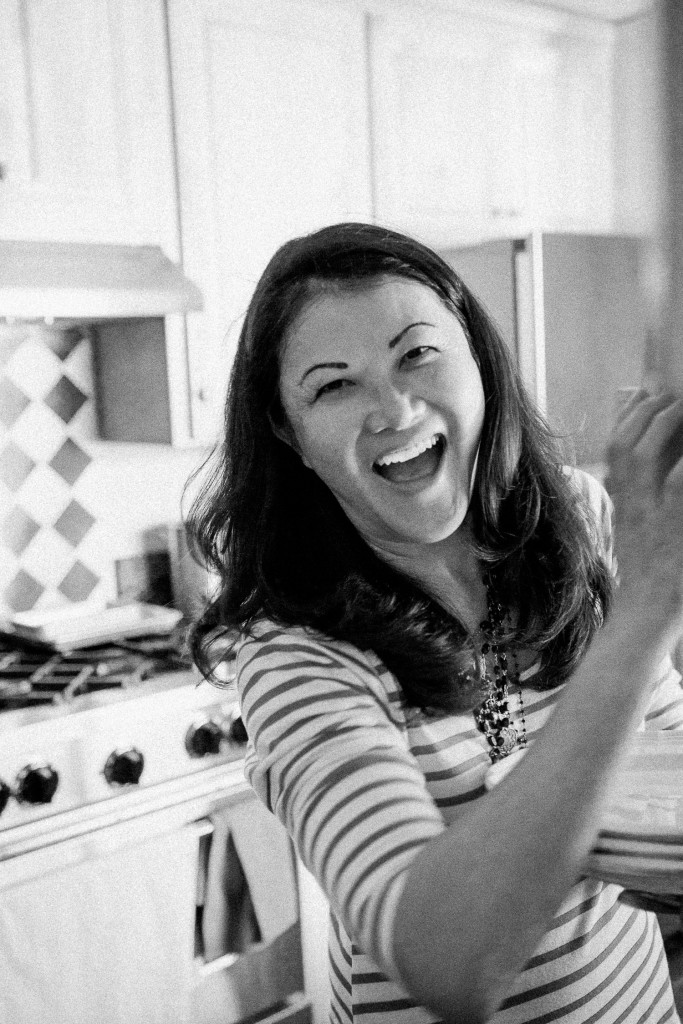
Hello, my friends! As you readers know, photography is a big part of my life. Not only is it a cornerstone on this blog, it’s allowed me to start my new business, Vero Kherian Photography. A LOT of you have asked me for food photography advice, and so here you go: Miss Cheesemonger’s top 7 food photography tips!
1. Shoot With Purpose
This is something that was really instilled in me when reading a biography of Ansel Adams—no, I’m not saying my food photography is in the same class as his magnificent photos! But his notion of “visualization,” that you should see the picture in your mind before you take it, has helped me a lot. I’ve reduced the number of photos I take, and get more out of the photos I do take, because I’m not photographing everything nilly-willy. I photograph my subjects with purpose. I know what I want to get out of my images—what mood I want to convey, what style I want to evoke. Sometimes life is fast and you need to just hope for the best when click the shutter, but luckily, food doesn’t really move much. If you are photographing food (or anything for that matter), take a few seconds and think about the ideas you want to convey with your image, and consider how the subject, angles, colors, light, and composition will support those ideas. Ask yourself if what you see before you is actually what your mind wants to capture, and why.
2. Understand How Your Camera Works
For the longest time, I photographed for Miss Cheesemonger using my little Canon Power Shot point and shoot camera. The photos were OK, but I didn’t understand how light worked, how my camera worked, or how composition worked. I managed to get decent enough images sometimes. My work definitely lacked consistency.
When I decided to really invest in photography, I moved up to a starter DSLR, a Canon Rebel SL1 [affiliate link], and got my first good quality lens, a Sigma Art 18-35mm f1.8 [affiliate link]. Miss Cheesemonger changed dramatically. I learned to shoot entirely in manual mode, so I learned how shutter speed (the higher the shutter speed, the faster the exposure time), aperture (the higher the number, the less light comes into the camera and the more in-focus the entirety of the image), and ISO (the higher the number, the more sensitive your sensor is to light) affect an image. I went through all the functions on my camera to at least try them once before deciding whether or not they’d become a part of my methodology. I got used to shooting wide angles for food because I really love creating fanciful cheesescapes for you guys! I also learned about editing in Lightroom [affiliate link], which I now use every day.
Recently, I moved to shooting food with a Sony a7 and the 28-70mm 3.5-5.6 kit lens [affiliate link], or sometimes the Zeiss 35mm f2.8 [affiliate link]. It’s been an interesting switch. There are a lot of different functions to learn on this camera than my starter DSLR, partially because I am now using a mirrorless photography system. That means that instead of a more mechanized DSLR system, everything in my camera is electronic. It leads to a different user experience. I am a fan of both DSLRs and mirrorless cameras, so if you want to upgrade from your phone or point and shoot camera, do the research and see what’s right for you. Again, I like to shoot my food with wide views to create my signature cheesescapes, and show context.
You know what, though? With time, people just assumed I was a “professional photographer” and that I had a “professional camera” when that wasn’t true. Up until fairly recently, I was shooting with an entry level DSLR—not pro-level gear by any means. What mattered, though, was that I had done my homework, I understood what makes a good photo, and I knew what I wanted my photos to represent. Once you understand photography and your equipment, how fancy your gear is matters way less than how you use it.
3. Study The Light
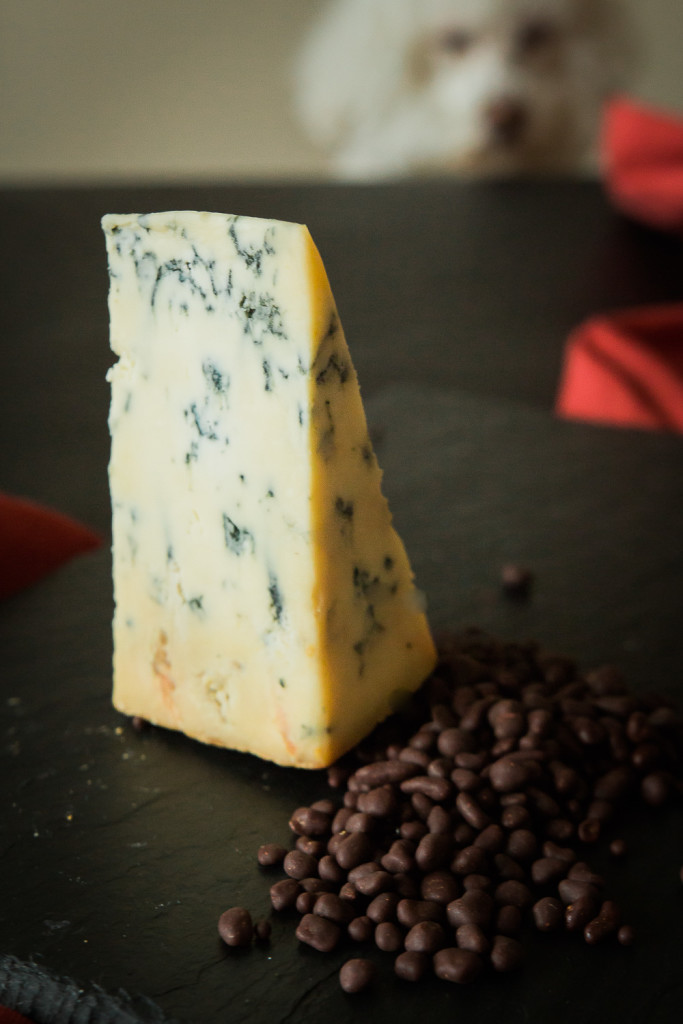
I shoot my food with just available light, and sometimes a white foam core board reflector. Luckily, my dining room gets a good amount of indirect light all day, so I can take photos at nearly any time. In my food photos, I tend to capture my food with as even a light as possible. When I want to reduce shadows coming in through my window, I put my white foam core board on the other side of my subject to bounce light back onto it. When I want some more dramatic images, I play more with light and shadow. For instance—are you in harsh, direct sunlight? That’s OK, just make sure you see where the shadows are falling, and decide if that’s what you want. Otherwise, look for open shade and photograph there. Are you going for a dreamy, light image? You probably won’t get that if you’re shooting your food in a dark space with fluorescent lighting. Lay down a white cloth, and go outside or to a window.
Avoid using that flash built into your phone and camera. Photos are almost guaranteed to look horrible.
4. Compose Your Image
What makes an image pleasing to the eye is a mix of both subjective taste and objective principles. You can always bend those rules, though! The first rule is the Rule of Thirds. Imagine your image is broken up by a tic-tac-toe grid. If you’re not centering your subject, you want to adjust your composition so that important elements in the photo fall along the lines of that grid, or at one of those grid intersections. Just about all cameras nowadays offer the option of turning that grid on in your viewfinder. Use that function until you get the hang of it!
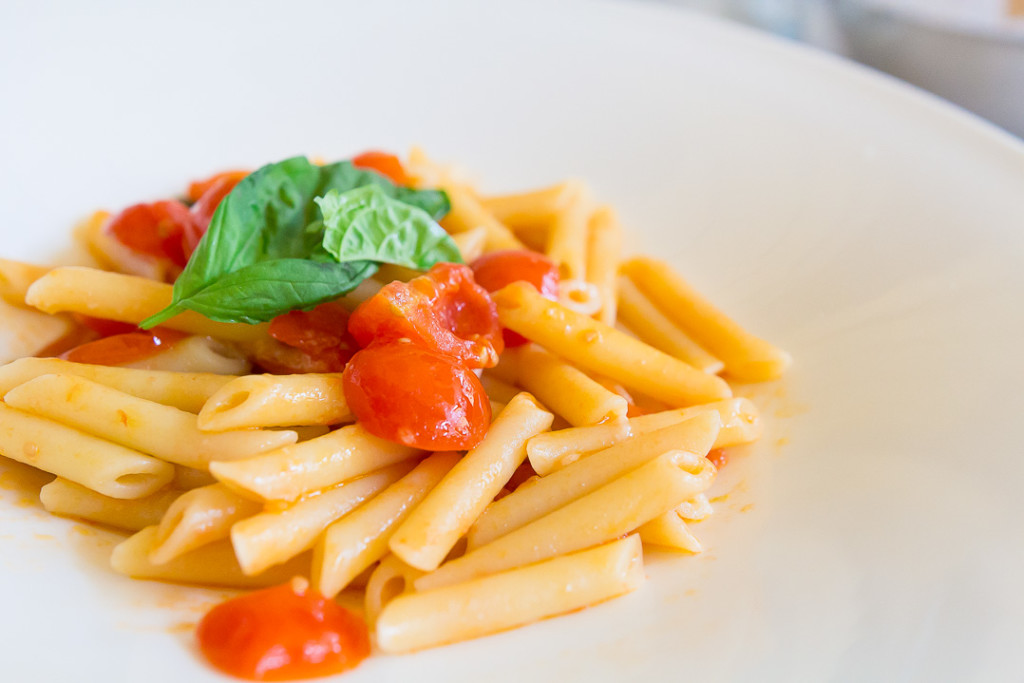
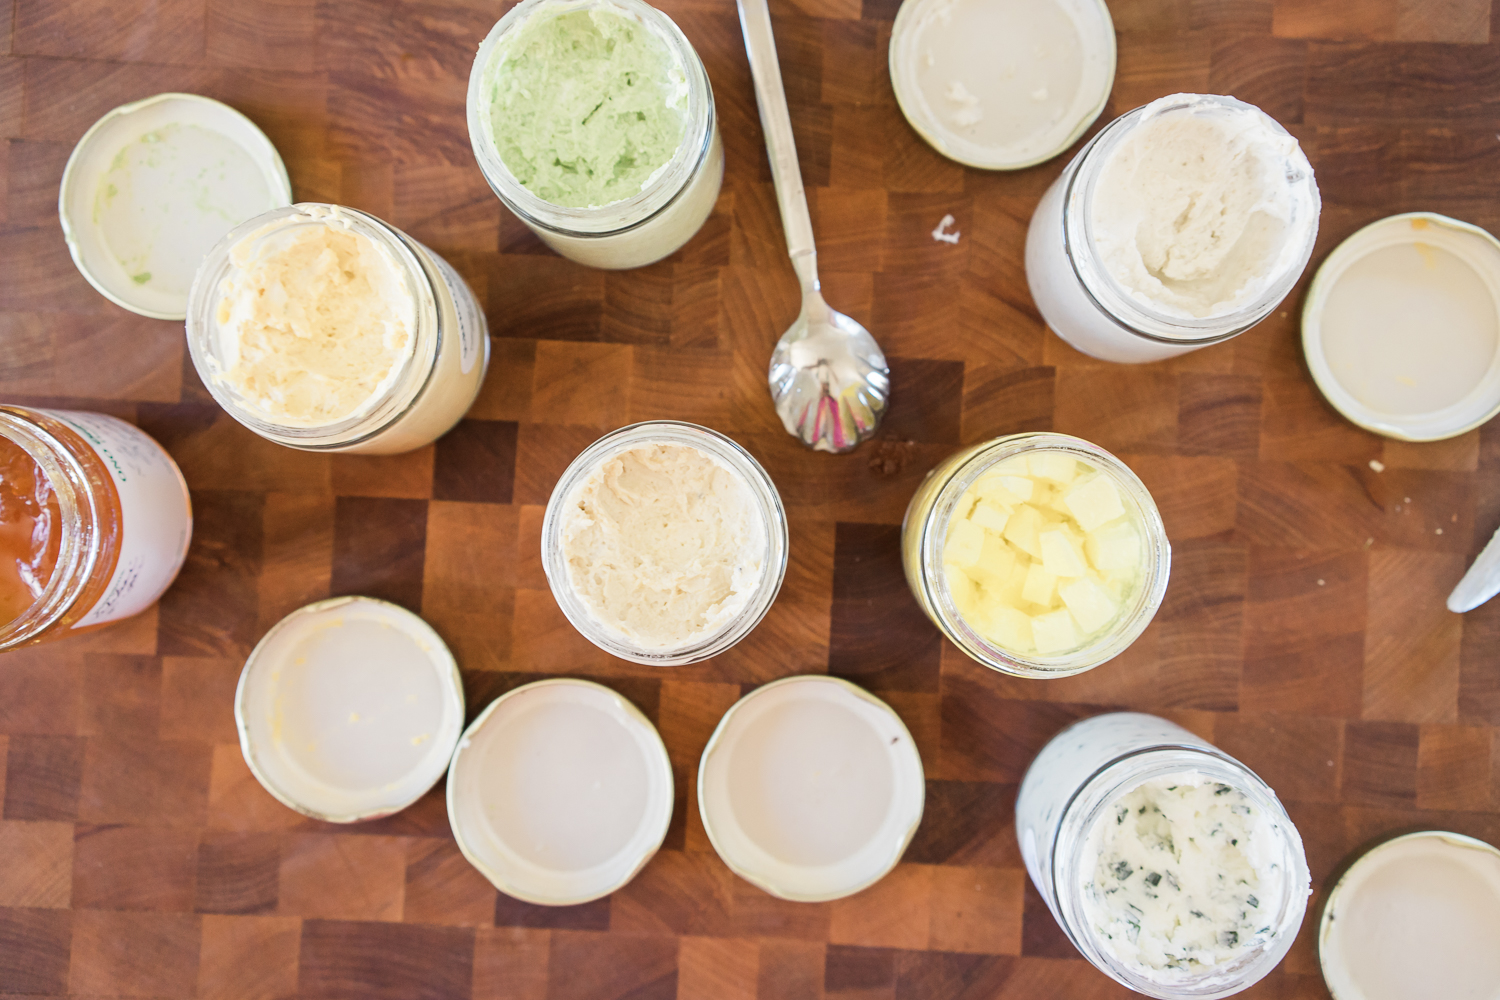
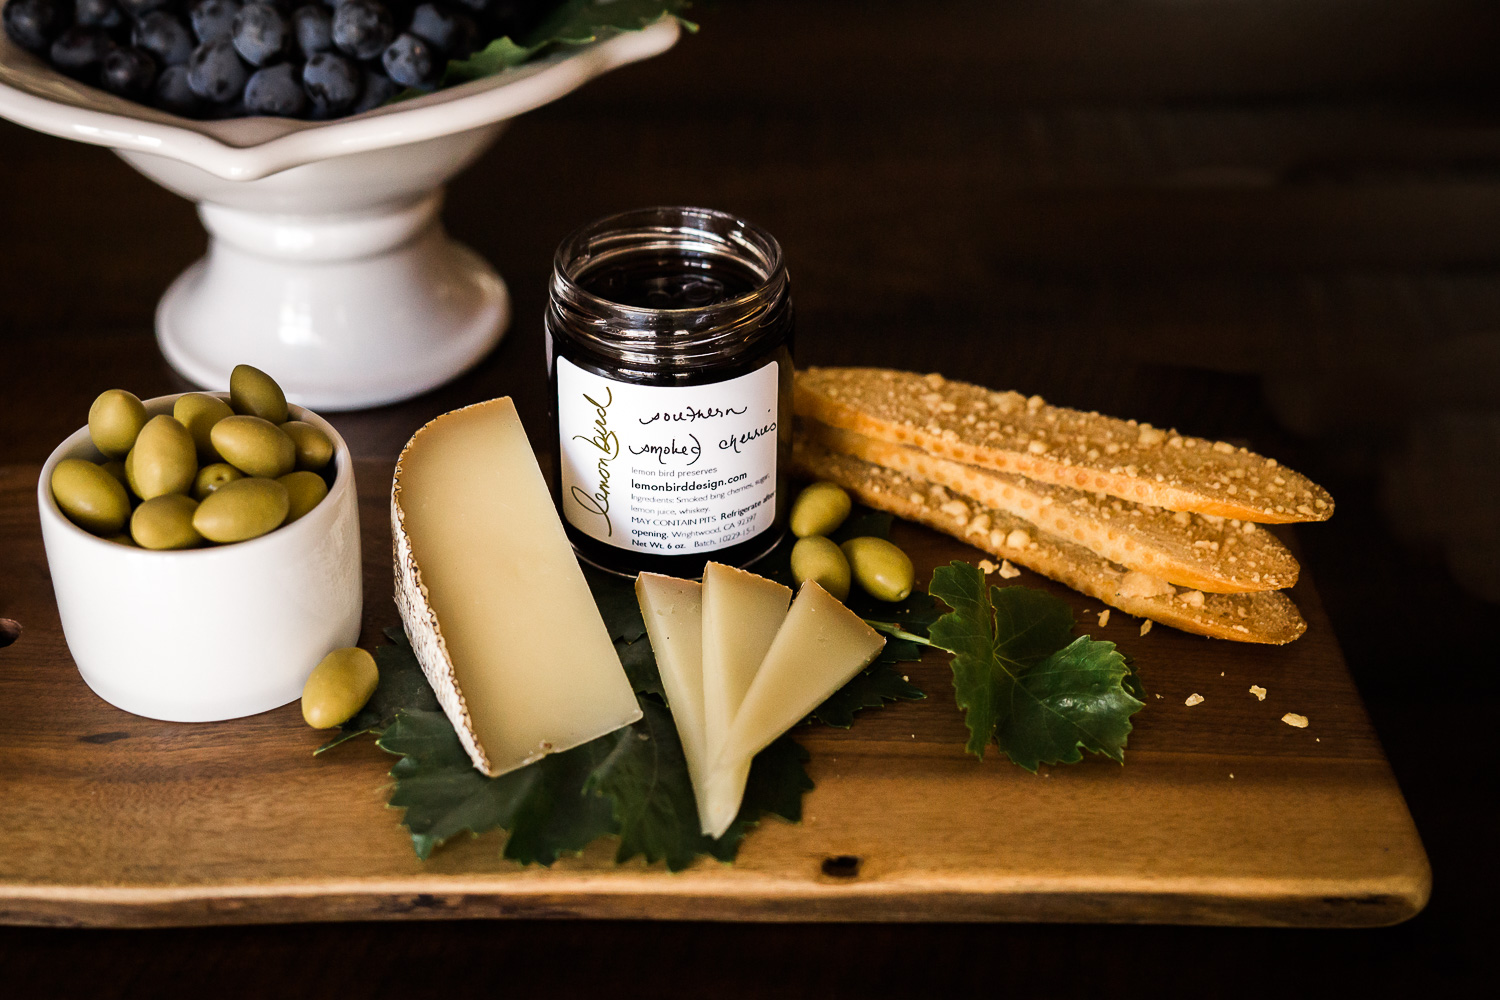
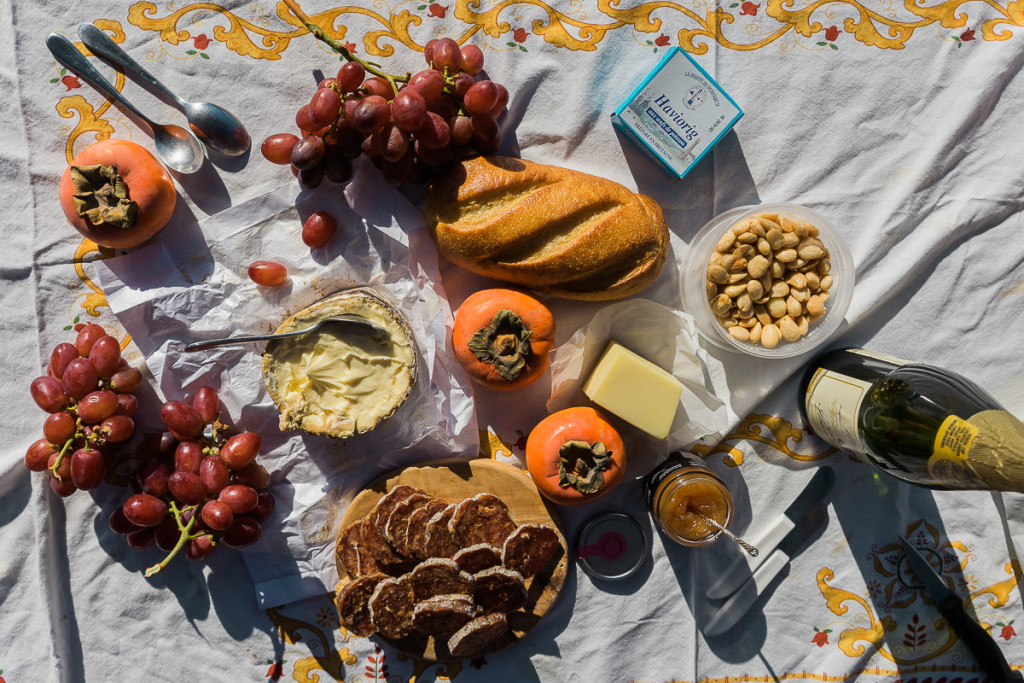
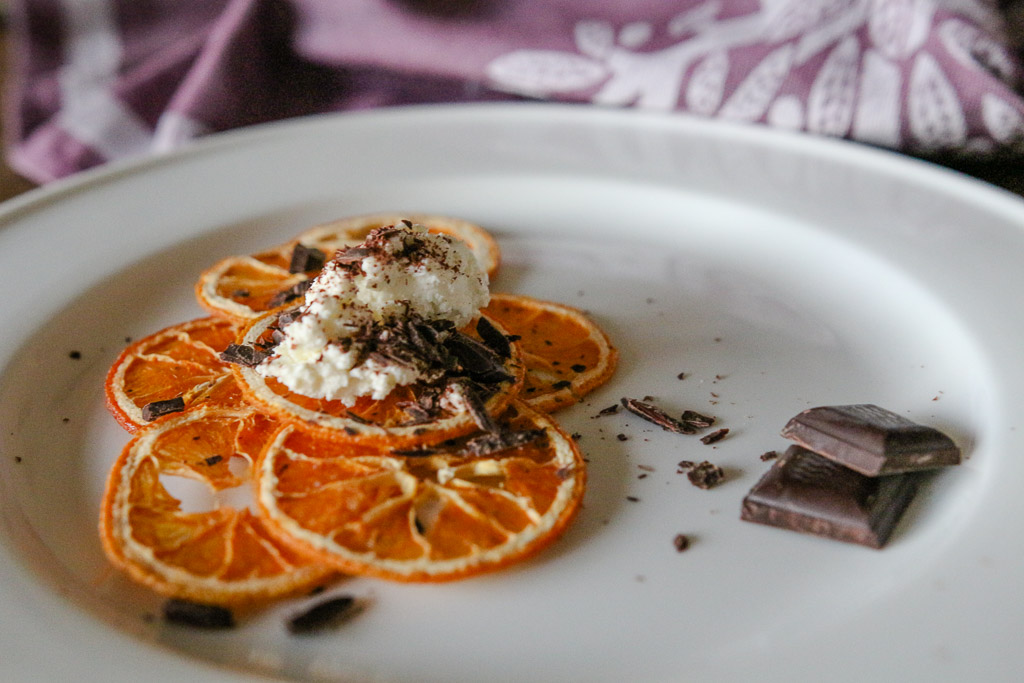
On regularity and irregularity: I have been known to nudge my plates and bowls around several millimeters at a time to get the right look. If I have scattered rose petals around my plate, for instance, I will look at every petal to make sure nothing is regularly spaced. Conversely, I will look over a line of cheese pieces to make sure nothing is out of line when I want uniformity. Or I will wipe the edges around plates and dollops of jam to keep them neat and tidy. Know what you want, and watch out for any wayward pieces.
Whether you are simply documenting food you come in contact with or are creating an image from scratch, always pay attention to how all the objects in your image are oriented.
5. Look At The Whole Photo
Plan your entire image, not just the subject. Is the background in harmony with the foreground? That random bottle of Windex in the background can ruin the mood of your perfect photo, and might take a lot of work to remove in processing later. Take note of everything in your frame, not just the subject, and see if it’s to your liking.
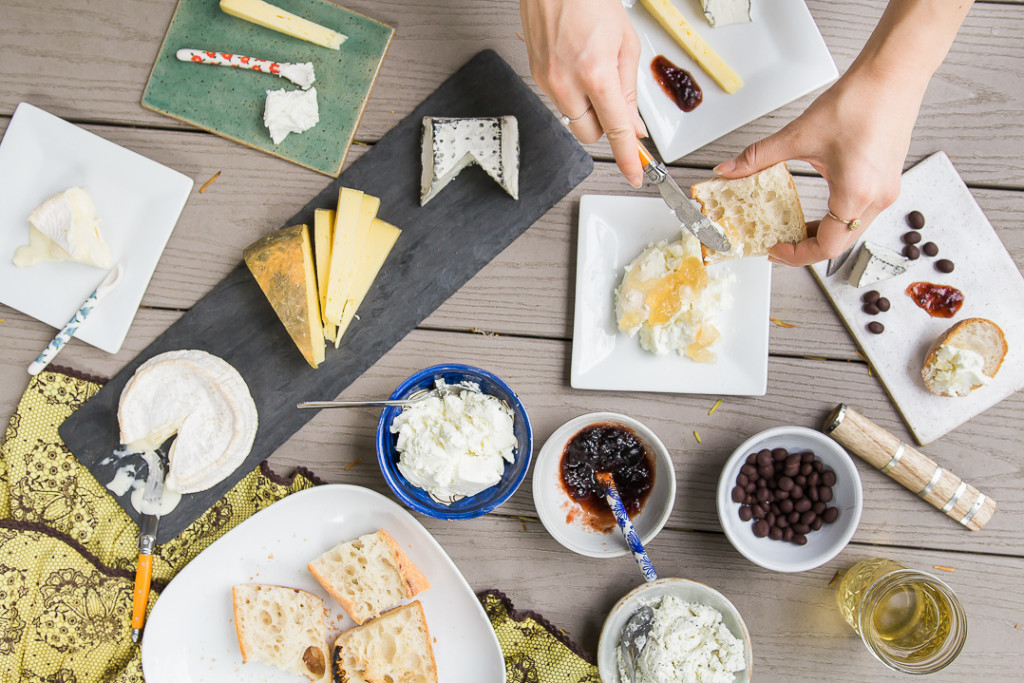
6. Get Messy
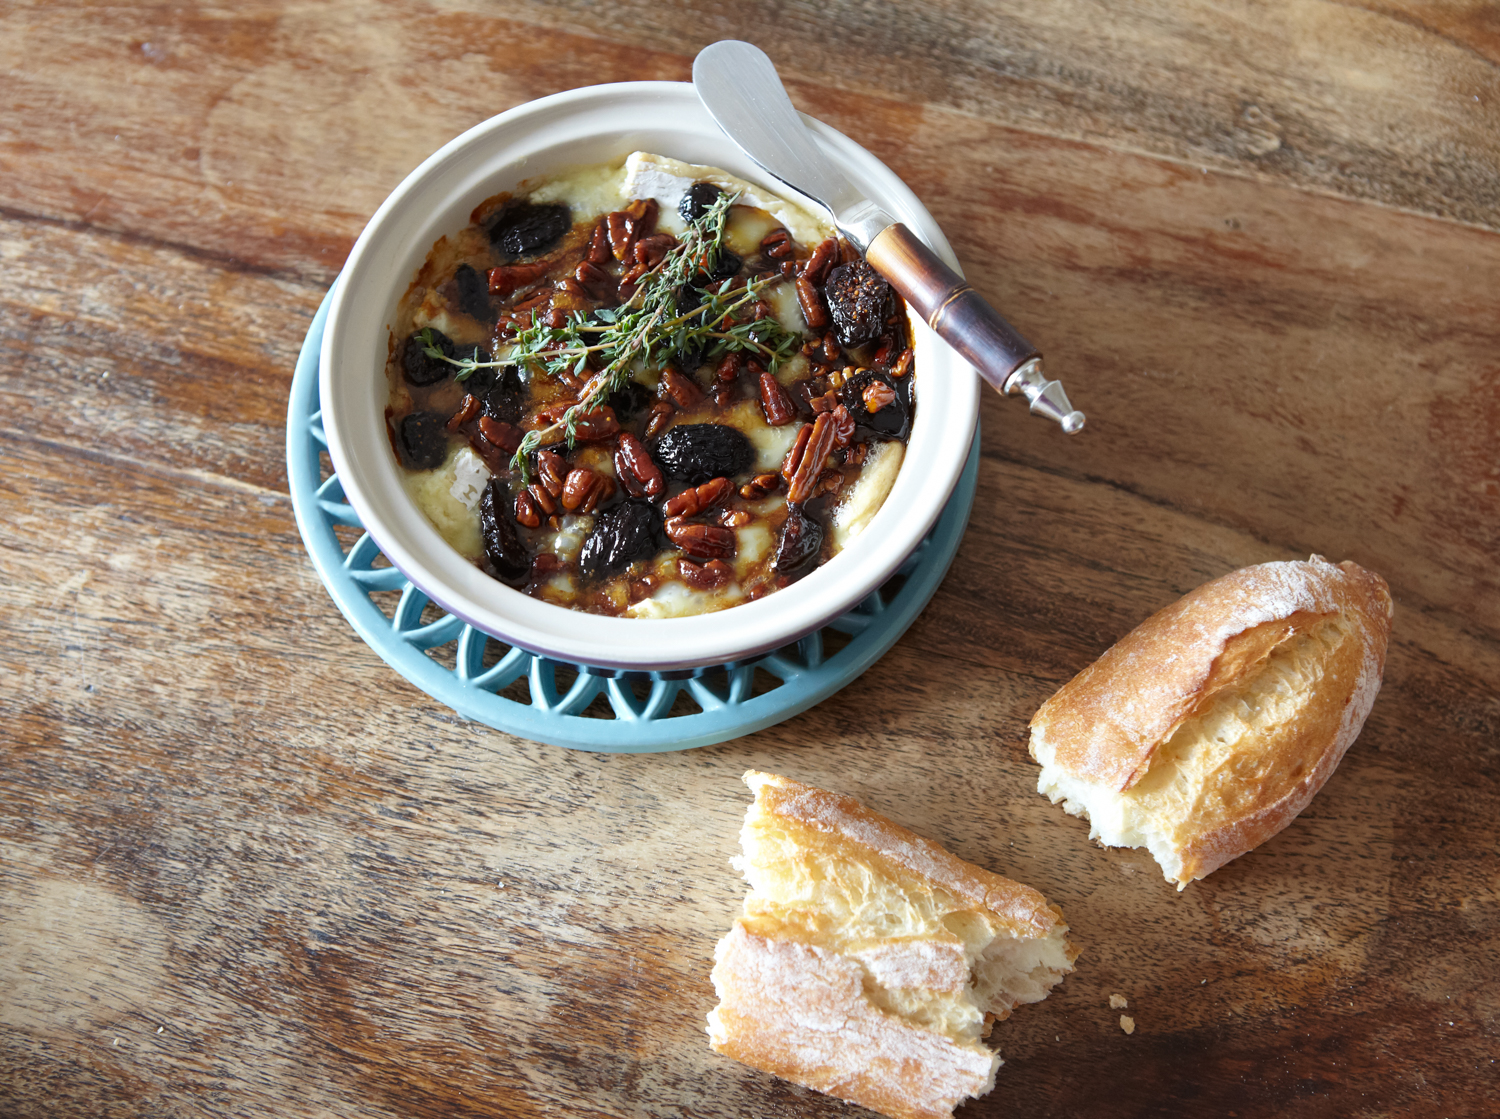
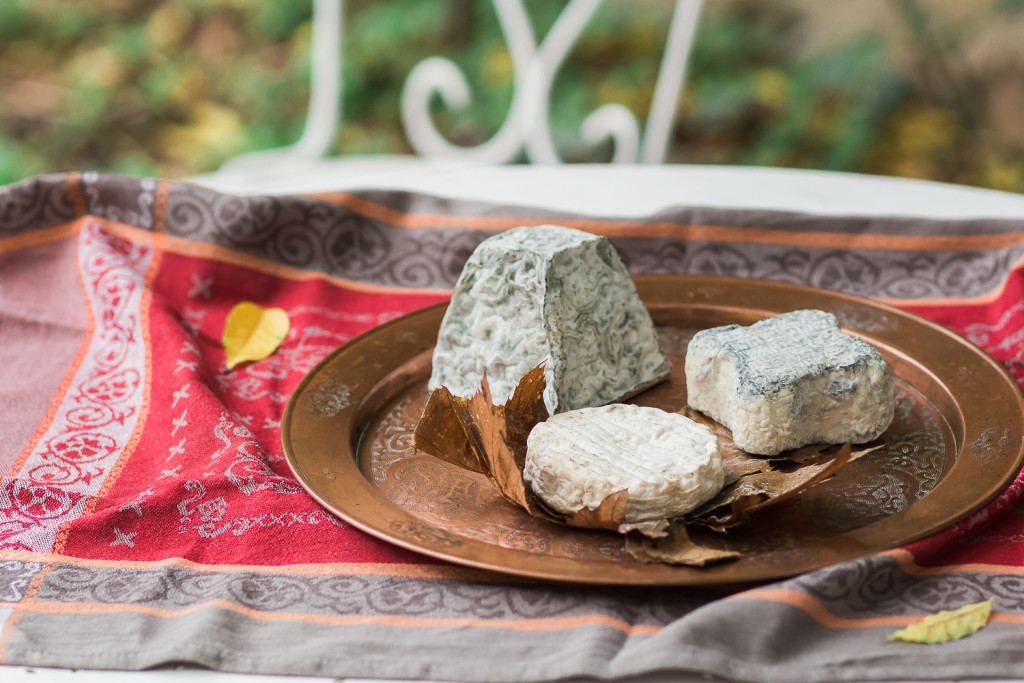
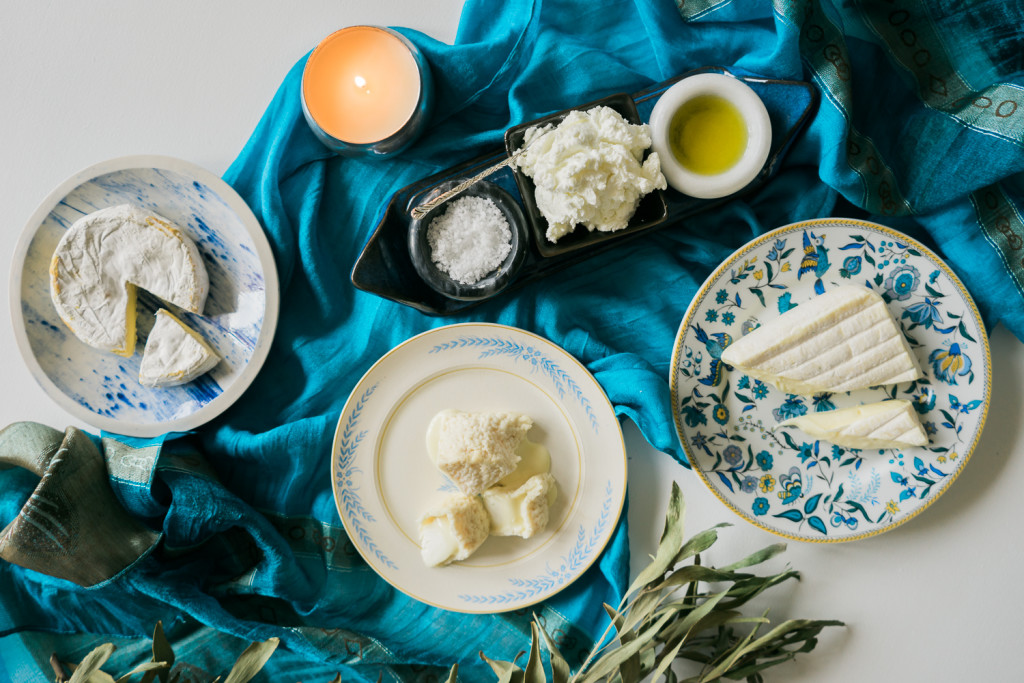
Sometimes a food photo looks better when that pie has been cut into, or when you’ve got flour all over the workstation. Get a bigger dollop of cream on top to really make things look abundant. I have learned that my photos look best when I’ve got a large work station, and fill it up with things—cheese, bread, jams, crackers, leaves, flowers, plates . . . There will be crumbs.
If you’re going for a clean, minimalist look, do it deliberately! Try both styles, do something that makes you uncomfortable, and see what you prefer.
7. Have Fun
Food photography is a means of self-expression, so make it mean something. Include something personal in your images, like your favorite spoon, flowers, or ribbon. Are you feeling moody? Go for some dark photos. Do you love cats? Find a tea towel covered in them and photograph your next broiled fish with it. Instagram loves overhead shots of food, but try out different angles, too. You’ll see that a lot of my Instagram images are shot pretty low.
That should be enough to help you a bit on your food photography journey! Always remember that this is a journey, and that everything you learn along the way is a reward in its own right!
Do you love photographing food? Tell me what you love about it in the comments below!
It’s my work to create great content for you. Do you love what you see? Here is how you can support me:
HIRE ME! Let me bring your food projects, business, and products to life. Image may not be everything, but a great one sure helps—Let’s create something beautiful together! See my food photography portfolio. Or see my portrait portfolio for portrait and candid work. Contact me to start brainstorming!
BUY through my affiliate account links at Amazon.com (where you can get nearly anything under the sun), the French Farm (where you can find delicious and beautiful French products for the kitchen, and get free shipping for orders over $75), and Taza Chocolate (maker of some of my favorite Mexican-style chocolates). Bookmark these links for later! You can purchase anything through them, not just what I recommend to you, and I will receive a small percentage of those sales at no extra cost to you! Everybody wins!
Bonjour, mes amis! Mes lecteurs savent que la photographie joue un rôle important dans ma vie. Ce fut une étape pour mon blog, et m’a permis de commencer une entreprise, Vero Kherian Photography. Beaucoup d’entre vous m’ont demandé des conseils de photographie, les voici : Miss Cheesemonger Top 7 conseils de photos de plats.
1. Photographier Avec Un But
C’est une chose que j’ai réalisée en lisant la biographie d’Ansel Adams. Je ne prétends pas que mes photos de nourriture sont de la même trempe que ses magnifiques photos! Mais sa notion de la “visualisation” des photos dans votre esprit auparavant, m’a beaucoup aidée. J’ai réduit le nombre de photos prises, tout en obtenant plus de chacune de ces photos, cela parce que j’ai arrêté de photographier au petit bonheur. Je photographie mes sujets avec un but. Je sais ce que je veux obtenir de mes images, quelle émotion je veux représenter, quel style je veux évoquer. Parfois la scène se déroule en direct, et vous devez appuyer sur le déclencheur et croiser les doigts, heureusement les plats ne bougent pas tant que cela. Si vous photographiez de la nourriture (ou tout autre chose), prendre quelques secondes et penser aux idées vous voulez évoquer, considérer le sujet, les angles, les couleurs, la lumière et la composition qui vont supporter vos idées. Posez-vous la question si ce que vous voyez en face de vous est ce que vous voulez capturer, et pourquoi.
_________________________________
2. Comprendre Comment Votre Appareil Photo Fonctionne
Pendant très longtemps, j’ai photographié pour Miss Cheesemonger en utilisant mon numérique compact Canon PowerShot. Les photos étaient OK, mais je ne comprenais pas comment la lumière fonctionnait, comment mon appareil photo a fonctionnait, ou comment composer une photo. J’arrivais parfois à obtenir quelques photos réussies. Mais mon travail manquait de cohérence.
Quand je décidé d’investir vraiment dans la photographie, je me suis passée à un DSLR d’entrée de gamme, un Canon Rebel SL1 [lien d’affiliation], avec un objectif de bonne qualité, un Sigma Art 16-35mm f1.8 [le lien d’affiliation]. Miss Cheesemonger a changé de façon spectaculaire. J’ai appris à tirer entièrement en mode manuel, donc j’ai appris comment la vitesse d’obturation (plus rapide est la vitesse d’obturation, plus court est temps d’exposition), l’ouverture (plus hautes est la valeur, moins de lumière pénètre dans l’appareil et le plus net sera l’image) et l’ISO (plus haute est la valeur, le plus le capteur sera sensible à la lumière) vont affecter une image. J’ai passé en revue toutes les fonctions de mon appareil photo pour les essayer une fois avant de décider si oui ou non elles devraient être part de ma méthodologie. J’ai essayé des prises de vue en grand angle pour la nourriture parce que j’aime créer des paysages de fromage pour vous! J’ai aussi appris comment utiliser Lightroom pour éditer les photos [lien d’affiliation], et je m’en sers maintenant tous les jours.
Récemment, je suis passé au Sony A7 avec le kit d’objectif 28-70mm 3.5-5.6 [lien d’affiliation], ou parfois le 35mm f2.8 Zeiss [lien d’affiliation]. Ce fut une transition intéressante. Il y a beaucoup plus de fonctions différentes à apprendre sur cet appareil photo que sur mon entrée de gamme DSLR, en partie parce que c’est un appareil sans miroir. Cela signifie qu’au lieu d’un système de DSLR plus mécanisées, tout dans mon appareil photo est électronique. Cela conduit à une expérience utilisateur différente. Je suis un fan à la fois des DSLRs et Mirrorless, donc si vous voulez augmenter votre qualité de votre photos de téléphone ou appareil compact, je recommande de faire des recherches et tester ce qui est mieux pour vous. Encore une fois, comprenez que mon but est de prendre des photos en plats en vue large pour créer mes paysages fromagers qui sont ma touche, afin de montrer le contexte.
Vous savez quoi, au débuts, des gens pensaient que j’étais une «photographe professionnelle» et que j’avais un équipement pro alors que cela n’a pas été vrai jusqu’à assez récemment. J’utilisais seulement mon DSLR d’entrée de gamme. Ce qui importait était que j’avais fait mes devoirs, j’avais compris ce qui faisait une bonne photo, et je savais ce que je voulais représenter. Une fois que vous comprenez la photographie, votre équipement est moins important que la façon dont vous l’utilisez.
__________________________
3. Etudiez La Lumière
Je photographie en lumière ambiante, parfois avec un réflecteur de carton blanc. Heureusement ma salle à manger reçoit beaucoup de lumière indirecte toute la journée, je peux prendre des photos à tout moment. Dans les photos de nourriture, j’essaie de capturer les plats avec une lumière uniforme. Quand je veux diminuer la quantité d’ombres créées par la fenêtre, je mets un réflecteur en carton mousse blanc de l’autre côté du plat pour refléter la lumière. Quand je veux des images plus dramatiques, je joue plus avec la lumière et les ombres. Par exemple, en lumière directe, faites plus attention à la façon dont les ombres tombent, et décidez si c’est ce que vous cherchez. Sinon profitez d’une zone couverte pour votre scène. Recherchez-vous ce look aérien et léger ? Vous ne le trouverez pas en photographiant dans un lieu sombre avec des éclairages fluorescent. Prenez une nappe blanche et allez dehors ou à une fenêtre. Et évitez de prendre des photos avec le flash de votre téléphone ou sur votre appareil photo. Les photos sont souvent horribles.
4. Composez Votre Image
Ce qui rend une image plaisante à l’œil est un mélange de goût subjectif et de principes objectifs. Cependant, les règles sont pliables. La première est la règle des « Tiers ». Imaginez que votre image est découpée comme une grille de morpions (3 par 3). Si vous de centrez pas votre sujet, vous voulez tout de même ajuster la composition pour que les éléments importants soient le long de ces lignes, ou bien au intersections de ces lignes. Presque tous les appareils ont maintenant une option pour superposer cette grille sur le viseur. Essayez cette option pour vous habituer.
A propos de harmonie et irrégularités : Je suis connue pour déplacer mes sujets par quelques millimètres à la fois pour obtenir la bonne composition. Si je parsème la scène de pétales de roses, je regarde chaque pétale pour vérifier sa position. Si je mets une rangée de morceaux de fromage, je vérifie l’emplacement de chaque morceau pour vérifier que tout soit correct. J’essuie le bord des assiettes pour que tout soit propre. Sachez ce que vous cherchez, et soyez sûr de l’obtenir dans l’image.
Que vous fassiez simplement une photo d’un plat délicieux qu’on vous sert, ou que vous créiez la scène de tout pièces, portez toujours une attention à l’orientation de tous les objets dans l’image.
5. Regardez La Photo Dans Son Ensemble
Planifiez votre image complète, et pas seulement le sujet central. Le fond est-il en harmonie avec le premier plan ? Un baril de lessive en arrière-plan peut ruiner l’ambiance de votre photo, et peut coûter beaucoup de temps à retirer par ordinateur. Regardez tout ce qui est dans votre cadre, et pas seulement le sujet, assurez vous que tout vous convient.
_________________________________
6. Mettez Le Foutoir
Parfois, une photo d’une tarte est plus belle avec une part enlevée, ou avec de la farine partout sur le plan de travail. Mettez une plus grosse cuillère de crème pour donner un sens d’abondance. Je préfère mes photos prises avec un grand plan de travail, bien rempli de fromage, de pain, de confiture, de crackers, de feuilles . . . il y aura des miettes. Je sais qu’il y a des gens qui aime un look minimaliste aussi. Essayez plusieurs styles et voyez lequel vous préférez.
_______________________
7. Amusez-Vous
Photographier les plats est une façon de s’exprimer, alors exprimez-vous ! Mettez une touche personnelle dans vos images—une cuillère préférée, des fleurs, du ruban. Est-ce que vous vous sentez sombre ? Ajoutez des ombres aux photos. Aimez-vous les chats ? Mettez un torchon couvert d’images de chats dans votre photo de turbot grillé. Essayez des angles différents—bas, haut, loin . . . il n’y a pas de limites !
Voilà quelques astuces pour vous accompagner lors de votre séjour dans la photographie. C’est vrai qu’apprendre la photographie est comme un voyage, et chaque nouvel élément qu’on apprend est cause pour célébration.
Est-ce que vous aimez photographier la nourriture ? Racontez-moi dans un commentaire en bas !